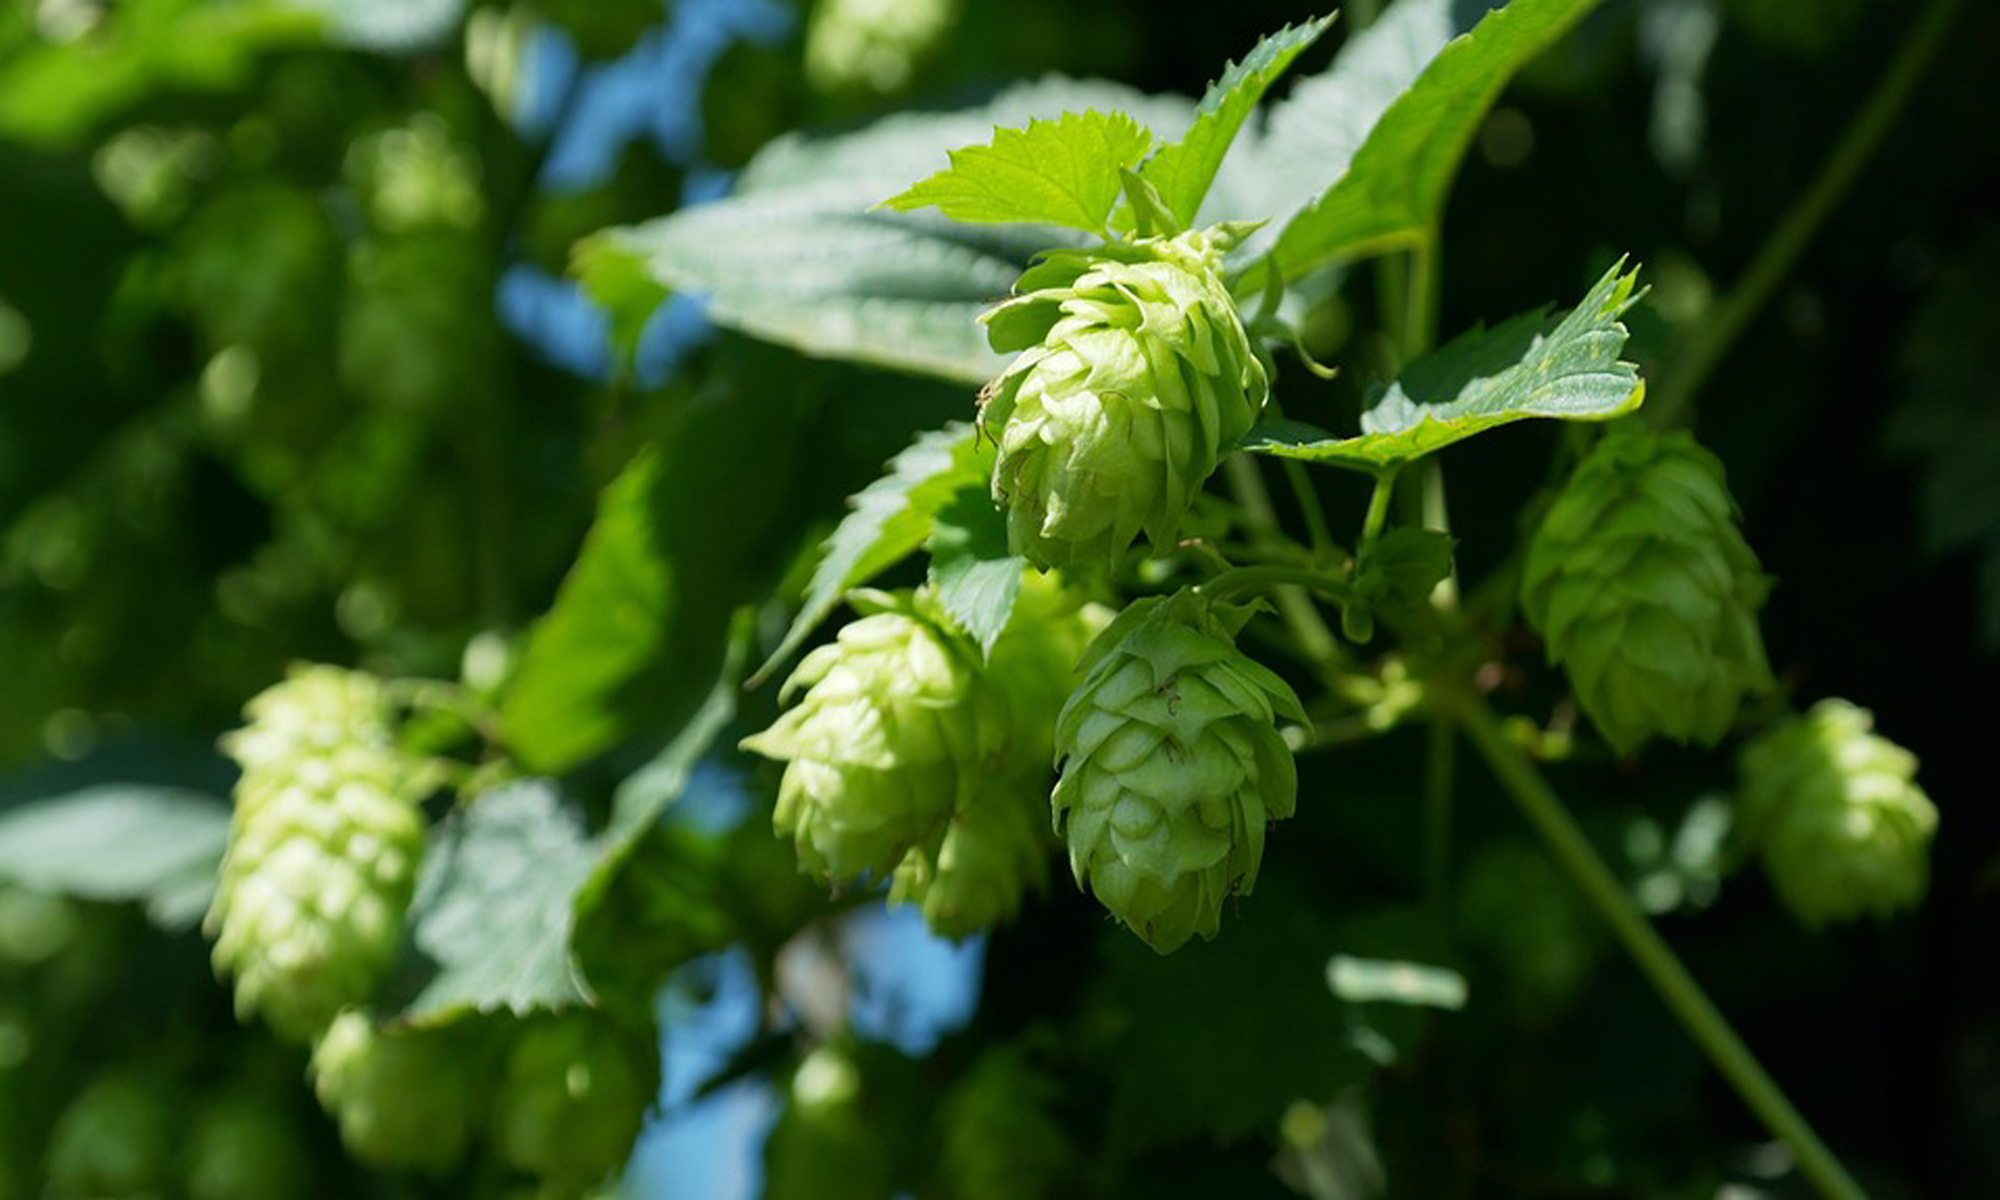
The Ultimate Hop Profile Guide

Its a good thing to know the hop profiles that you put in your beer as well as the hop substitutes for that particular beer that you are making.  So many times there are these weird out of the blue hop shortages that happen. The worst was just a few years back which homebrew shops were limiting the amount of hops people could buy because they didn’t know when they were going to get them.

The problem with hop shortages is that they really happen over night.  The one a few years ago happened because in Czech they had a hail storm which wiped out the hop fields and then in Yakima where the hops are stored in the US, there warehouse burned down.  It was the perfect storm which made some hops go up to $7.99 and up for 2 ounces.  It was bad.

Either way, it’s nice to be prepared.  So at Jay’s Brewing we created this Hop Profile Guide with some substitutes to help you better prepare yourself in case hops become difficult to get.

Amarillo:

Sometimes described as “super cascade”.

Alpha Acid: 7-9%

Usage: Flavor and Aroma in American style ales

Possible Substitutes: Cascade, Centennial, Summit, Ahtanum

Brewers Gold

Spicy and fruity

Alpha Acid: 8-10%

Usage: Bittering

Possible Substitutes: Bullion, Chinook, Galena, Nugget

Bullion

One of the oldest high-alpha hops in the world. It’s and English hop.  It is earthy/musty

Alpha Acid: 6.5-9%

Usage: Bittering

Possible Substitutes: Columbus, Northern Brewer


Cascade

Very versatile hop that presents itself as citrusy and flowery.

Alpha Acid: 5-7%

Usage: Flavor, Aroma, and Bittering.

Possible Substitutes:  Amarillo, Centennial, Summit

Centennial

Similar to Cascade but with a higher alpha acid %.

Alpha Acid: 7.5-11%

Usage: Flavor, Aroma, and Bittering.

Possible Substitutes: Amarillo, Cascade, Columbus, Summit

Challenger 

Strong, spicy. A clean bittering hop.

Alpha Acid: 6.5-8.5%

Usage: Bittering Possible Substitutes: Perle, Admiral

Chinook

Spicy aroma, somewhat herbal.

Alpha Acid: 10-14%

Usage: Bittering.

Possible Substitutes: Brewers Gold, Columbus, Galena, Nugget, Northern Brewer

Cluster

This was the precursor to cascade hops, so very similar.

Alpha Acid: 6-8.5%

Usage: Bittering Possible Substitutes: Galena, Cascade

Columbus

Herbal aroma, solid bittering hop

Alpha Acid: 11-15%

Usage: Bittering.

Possible Substitutes: Magnum, Chinook, Northern Brewer, Warrior, Millenium, Bullion

Crystal

Slightly spicy aroma

Alpha Acid: 3-4.5%

Usage: Flavor and Aroma

Possible Substitutes: Mt. Hood, Liberty, Hallertauer, Tettnanger, Strisselspalt

East Kent Goldings

Traditional English ale hop.

Alpha Acid: 4-6%

Usage: Flavor, Aroma, and Bittering.

Possible Substitutes:  Fuggle, Progress, First Gold

Fuggle

Grassy, light aroma. Used in English style Ales.

Alpha Acid: 4-6%

Usage: Flavor, Aroma, and Bittering.

Possible Substitutes:  Willamette, Styrian Golding, Tettnanger, Newport

Galena

Pretty bitter hop, but extremely clean.

Alpha Acid: 10-14%

Usage: Bittering.

Possible Substitutes:  Brewers Gold, Nugget, Cluster, Chinook, Eroica, Newport

Glacier 

Citrus aroma with candy like qualities.

Alpha Acid: 5.5%

Usage: Aroma

Possible Substitutes:  Willamette, Fuggle, Tettnanger, Styrian Goldings

Hallertau

Nice all-around hop with pleasant characteristics. German noble hop.

Alpha Acid: 3-6%

Usage: Flavor, Aroma, and Bittering.

Grown in the U.S. and Germany. Possible Substitutes:  Liberty, Tettnanger, Mt.Hood, Vangaurd, Tradition

Horizon

Presents a nice, soft round bitterness for such a high-alpha hop. 

Alpha Acid: 11-14%

Usage: Flavor, Aroma, and Bittering.

Possible Substitutes: Magnum

Liberty

Very light aroma

Alpha Acid: 3-6%

Usage: Flavor and Aroma.

Possible Substitutes: Hallertau, Tettnanger, Mt. Hood, Crystal

Magnum 

Alpha Acid: 13-15%

Usage: Bittering

U.S. Possible Substitutes:  Horizon, Newport

Mt. Hood

Extremely close to Hallertau, but a bit spicier

Alpha Acid: 4-7%

Usage: Flavor and Aroma.

Possible Substitutes: Hallertauer, Liberty, Crystal, Strisselspalt

Northern Brewer

Clean hop, has woody characteristics to it

Alpha Acid: 7-10%

Usage: Flavor, Aroma, and Bittering. Good all-around hop. Used quite often in Steam Beers.

Possible Substitutes: Nugget, Chinook, Columbus, Bullion, Perle, Styrian Aurora

Nugget

Very strong bittering hop.

Alpha Acid: 11-14%

Usage: Flavor, Aroma, and Bittering 

Possible Substitutes: Cluster, Galena, Brewers Gold, Warrior, Eroica, Target, Millenium 

Perle 

Almost minty smell to it.

Alpha Acid: 6-9%

Usage: Flavor, Aroma, and Bittering  Possible Substitutes: Challenger, Northern Brewer

Progress

English hop developed to provide a more wilt-resistant alternative to Fuggles.

Alpha Acid: 5-8%

Usage: Bittering.

Possible Substitutes: Fuggles, E.K. Goldings

Saaz

Very light and clean, seen in a lot of Pilsners

Alpha Acid: 3-4.5%

Usage: Flavor and Aroma.

Possible Substitutes: Sladek, Lublin, Sterling, Ultra, Vangaurd

Simcoe:

Has a passion fruit aroma to it.

Alpha Acid: 12%-14%

Usage: Bittering and Aroma

Possible Substitutes: Northern Brewer, Galena

Sterling 

Earthy, spicy, but very similar to Saaz

Alpha Acid: 6%-9%

Usage: Aroma

Possible Substitutes: Saaz, Lublin
Styrian Goldings

Very similar to Fuggles

Alpha Acid: 5.5%

Usage: Bittering and Aroma

Possible Substitutes: Fuggle, Willamette


Tettnanger

Spicier then Hallertau.  It is a traditional german noble hop.

Alpha Acid: 3-5%

Usage: Flavor and Aroma.

Possible Substitutes: Hallertau, Liberty, Fuggle
Vangaurd

Slightly flowery, mild in aroma.

Alpha Acid: 5.5% – 6%

Usage: Aroma

Possible Substitutes: Saaz, Hallertauer


Warrior

Extremely clean bittering hop.

Alpha Acid: 15%-17%

Usage: Bittering

Possible Substitutes: Nugget, Columbus

Willamette

Hybrid of fuggles, earthy and woody

Alpha Acid: 4%-6%

Usage: Aroma and flavoring

Possible Substitutes: Styrian Golding, Target, Fuggle, Tettnanger, Glacier

We did get a bit of help and these were the sites that we went to:

http://www.thebitterbrewer.com/viewtopic.php?f=29&t=80

http://www.homebrewzone.com/hops_varieties.htm


Adding Spices To Make A Pumpkin Pie Brew Like A Boss

It’s time to make the pumpkin ale brew taste like a pumpkin pie. If your totally lost on what you need to do to get up to this point or what I’m talking about, it may be a good idea to refresh yourself and reread the blog that this corresponds to this one.

As a reminder, the reason why I add all of these spices to the secondary is that I find you don’t have to add as much to the beer to have the flavors of the spices come out, especially in the aroma department.  Having the spices in the aroma is particularly what I like.

What you need:

2 vanilla beans

1.0 tsp pumpkin spice

1 tsp nutmeg

1/2 tsp ginger

1/4 tsp cinnamon

1) Take the spices listed above and measure them out, put them in a bowl.

2) Take those vanilla beans out of there bottle then make a slice down the center of them.  The real flavor of the vanilla bean is inside of the bean itself.  With that said, you want to make sure that you cut them open the long ways.

Below is a picture of the beans cut in half.

Fill a pot with about a cup or so of water and bring to boil.

After the water starts to boil, add the vanilla beans to it and let it boil for about 30 seconds, your doing this to kill bacteria that might be on the beans so you don’t contaminate your brew that you worked so hard for.

After the vanilla beans have boiled add the measured spices that were in the bowl into the boiling water.  Note: I have listed the spices to what I like in my beer. It is really subjective, if you like your brew to have lots of spices add more.  If you would like your beer to be light on the spices don’t add as much.  What I have listed is purely based off of what I like and I don’t expect everyone to enjoy what I like. 

Turn off boil. Note: Even though it is not listed, at this point I added half a pound of maple syrup to it.  I’ve actually never done it before to a pumpkin brew and thought it could be different.  I did it because I wanted it to smell sweeter.  I only added half of pound of maple syrup because that’s all I had in the pantry at the time.  Never doing that to a pumpkin pie brew before, I don’t know what is going to happen actually or if I’ll be able to taste it.  When I taste it I’ll let you know though.

While the mixture of spices are cooling down (which shouldn’t take long because it’s only a cup or so of water) take your beer which is in the primary and siphon it over to secondary to, presuming that you have cleaned and sanitized everything.

After this is done, add all of your spices and vanilla beans into your secondary fermentation and then your done for 2 weeks.  You can leave it in longer if you would like, but 2 weeks usually is good enough for me.

Here is a picture of the vanilla bean seeds floating around. 

Conclusion:

I found that vanilla beans to be kinda of expensive this year when I went to Safeway to pick them up.  They were about $6 for one bean.  Which means that they come out to be $12 and some change for this recipe, and those where the cheapest ones (they had some for $20 a bean).  I still believe that they are better then extract but never the less, you can always get them online for cheaper.

I think also the potency of the spices deals with how old your spices are, don’t quote me on that though.  What I’ve heard is that the older the spice the, “duller” they are in flavor.  So depending on what you want as well as the age of your spices, you might add more or less. If your not confident with the spices, or you think mine is too much or too little, act appropriately and just add slowly into your boiling water then smell.  Stop adding the spices once you have reached the smell that you like. If you think that I’m adding a lot of spices, just keep in mind that some internet stores will literally give you 5 oz of spices in a pumpkin ale kit… what the hell? That’s more then a quarter pound of spices in a beer.  REALLY?! I guess they live by the phrase, go big or go home. Either way, some may like that, not I, that’s to much for me. But to each is there own.

At the end of the boil, I smelled the mixture and it wasn’t as sweet of a smell as I wanted or anticipated.  I just ended up adding some maple syrup to it.  I’ve added maple syrup to other beers before, one which I’ll put posting the recipe soon, but never to a pumpkin brew.  I’ll see if it comes through when I taste it.  After I added the maple syrup to the mixture I could smell it cutting threw the spices and it did smell sweeter, we’ll see how it goes.

So that’s it, we sit and let it do its thing in the secondary for about 2 weeks if you want more of the flavors lean on 3-4 weeks then bottle.  If you were hoping to have this done by Halloween it may be cutting it close, I would just plan on having this with thanksgiving.

I’ll make sure to post when it comes to tasting and see if I’ll tweak this recipe when it comes to next year.


Related Post

Pumpkin Ale Recipe

Barley Wine Recipe

Adding Spices To Pumpkin Ale

The Answer Guide To 5 Base Malts

Many home brewers know of, or have heard of base malts. You’ve probably seen them in recipes but may not really know the major differences about them.  There are quite a few different base malts: 2-Row, 6-Row, Pilsen Malt, Pale Malt, Wheat Malt, Maris Otter,  just to name the ones that come to the top of my head. Yes, all of them are different.

If you are an all-grain brewer you know that when you use a base malt it will normally be about 5lbs up to 15 lbs.  On a small scale, base malts in general have very little differences but when using that much of them these differences get magnified. That’s why we created, The Answer Guide To 5 Base Malts.

I’m generally a laid back brewer, I really go with what works and really eager to learn new stuff.  No matter how laid back of a home brewer I am I have this itch to know why I do things when brewing, that allows me to be more flexible with my brews and change them if needed.  I don’t need to know the scientific reason but something that I could repeat to other home brewing friends. Knowing the different base malts when doing an all-grain brew is one of those things that I just feel is important to have a basic understanding of.  So without any more hesitation lets dig into the only guide you’ll need to know for base malts.

So what is a base malt? Well a base malt is the key source of getting fermentable sugars in your beer, but it also deals with the main flavor in the beer as well.  Normally in all-grain recipes you will see these as 5lbs and more.   With the guide below one note I would like to make, Lovibond is the color.  With most grains a “L” is put next to the number.  An example of that would be for crystal malts: 20L, 40L, 60L, 80L, 120L.  But for the base malts we are going to look at:

1) 2-Row 2) 6-Row 3) Pilsen Malt 4) Pale Malt 5) Maris Otter

1) 2-Row

Lovibond: 1.8

Flavor: It is clean and sweet with a mild malty finish.

Note: This is a good base malt for most American Beers.  It has a higher yield than 6-Row but lower protein than 6-Row.

2) 6-Row

Lovibond: 1.8

Flavor: Mild, grainy and a bit malty.

Note: More husk than 2-Row, more enzymes than 2 row. This is a great base malt for American beers as well.

3) Pilsen Malt

Lovibond: 1.0

Flavor: Sweet and clean.  This particular base malt is the lightest of the base malts and really allows the specialty grains to come through.

4) Pale Malt

Lovibond: 3.5

Flavor: Biscuit/nut like flavors.  It is a heavier version of 2-Row. Low in protein. Again its another American base malt.

5) Maris Otter

Lovibond: 3.5

Flavor: Biscuit/nut like flavor. Very good in producing beers with full body flavoring.  This is an English style base malt so it’s really good with English style beers.

What to do with this information:

When looking at the pictures above, you might be thinking, ‘Ya, they look like the same grain…” If you are thinking that I really couldn’t argue with you.  While they look like the same grains, the characteristics of these are completely different.  Also remember that the difference in color between these is on the lines of 2 Lovibond.  So your not talking about a difference such as chocolate malt and white wheat, these are really light color differences.  The differences in color, taste, aroma are all small, but when using 10 lbs they turn out to be big.

I really enjoy making session beers, most of them are actually European brews. When I make my European brews I like to use Maris Otter because it brings out those malty flavors.  I find that Maris Otter is a great one for the session brews because you don’t have to use as much to get an alcohol that fits into that style.  Maris Otter also brings out nutty and biscuit flavors that are not found in other types of base malts.

6-Row in my mind is the wild card.  A lot of the time home brewers will skip over the notion to use 6-Row as their base malt.  If you are using high levels of rice or corn in your recipe, I would recommend using 6-Row as your base malt because it has a higher nitrogen level.  Without getting into straight up, “beer geek” talk, it’s important because you will significantly reduce the buttery taste in your brew (or known as diacetyl flavors).  Another great time to use 6-Row is when your using wheat malt.  I find that it helps with the sparging a bit because it is huskier than the 2-Row.

Pils Malt is one that I can tell you that I don’t use a whole lot because in general I don’t make those types of beers a lot.  I can tell you though, if you are looking to make a lager this is the brew.  It is clean and light so it will add to the crisp flavor of a lager.  Also, if you are really trying to bring out flavors from the specialty malts, this is a good option for you as well. I have a buddy that uses strictly pilsner even when recipes call for 2 Row.  I’ve tasted his beer as well and they taste great.  I think that’s what ends up happening though, is you brew to what you like and what you want to bring out of the recipe.

There is much discussion on the internet about the difference between 2-Row and Pale malt. Honestly, I don’t think a lot of people would notice a difference between the two if you wouldn’t point it out.  Pale malt is a bit darker in color then 2 row and you’ll also find that it has a maltier flavor to it.  It’s getting into the ball park of M.O but it really isn’t there.

Conclusion:

Not all base malts are the same. In fact they really hold a lot of different characteristics based towards the type of brew that you might be thinking about making.   When in doubt most people will just use 2-Row.  While I’ll be the last person to to tell you that there is something wrong with that line of thinking, I just believe that you should know why you are using certain grains and especially base malts in your brew.  The only real reason is that it allows you to be a better brewer in the sense that you are more flexible in your recipes as well as more versatile.  With that said, is there any type of malt that you prefer to use for all-grain?

BYO About Base Malt


Related Post

All-Grain Series

How to Make Your Own Recipe

No Bells or Whistles Hard Apple Cider

Hard apple cider is easy to make.  Also as far as it goes, hard apple cider can be  pretty cheap to make if you are going to be making a smaller batch. I just recently made a batch with a recipe that is from my great grandmothers recipe book. I have dubbed this recipe the, No Bells or Whistles Hard Apple Cider.  This particular recipe is simple.

The key to making good hard apple cider is, you need to start with good apple cider. By good I mean without preservatives in it.  I can not stress that it has to be WITHOUT PRESERVATIVES.

So what you need for this recipe is:

1 gallon of apple cider

1.5 cups of brown sugar

1 packet of dry wine yeast.  (I prefer KV-1116)

1 gallon glass jug

1 air lock

1 #6 stopper drilled

1 gallon of cider

Directions

Take the cider, pour it in your brew pot and add 1.5 cups of brown sugar.  Turn on the heat and bring to boil.

Let the cider boil for about 15 min.  Once you have boiled the cider for 15 min turn off the heat and cool down to room temp.  At this point in time its probably good if you have a funnel.  Funnel the apple cider with sugar in it into your 1 gallon glass jug.

Now its time to make it, “hard”.  Keep in mind that the yeast packets are usually good for 5 gallons, so adding the whole packet will result in a crazy fermentation and a yeasty product.  It’s just good to think ahead.  After you add the yeast, put on the air lock and let her do her thing.

This hard apple cider recipe will ferment for about 7-10 days then you can bottle it.  Bottle it just like beer,  I prefer using carbonation drops on smaller recipes like this so I don’t have to mess with fractions, call me lazy.

Either way you are going to ferment this for about 2-3 weeks and then your good.  Enjoy.

Do you guys have any killer hard apple cider recipes?


Related Post

Dry Apple Wine Recipe

Robust Porter Recipe


Make A Pumpkin Pie Brew Like A Boss

Pumpkins are now at stores, which means one thing, its Pumpkin Ale Time!  I love my pumpkin ales.  You can litterally do what ever you wish with a Pumpkin Ale.  This recipe is one that I enjoy making, it really taste like a pumpkin pie in your mouth.

At the end of the recipe I have an analysis of why I chose to do it this way.

Ingredients:

Primary Fermentation

6.6 lbs golden light malt extract

.5 lbs 2 row – which will turn into toasted malt (makes sure it is bagged by its lonesome, away from all other specialty grains)

.5 lbs Vienna Malt

.25 lbs 60L Crystal Malt

.5 cup of Brown Sugar

1 oz Northern Brewer Hops (60min Boil)

1 Large Pumpkin

Safale 05 or WLP 001 California Ale Yeast

Secondary Fermenation Ingredients

2 vanilla beans

1.0 tsp pumpkin spice

1 tsp nutmeg

1/2 tsp ginger

1/4 tsp cinnamon

Directions

You might want to read over the directions first before starting.  I’ve laid them out in a way so you can do as much as you can with your time so this doesn’t take half of your day.  WARNING: YOU WILL BE MULTITASKING 

Take your brew pot, fill with 2.5 gallons of water, put on the stove and turn on heat. At the same time turn on the oven to 350. Your going to have to keep an eye on your water and turn off the heat when water reaches 150 degrees.  In the mean time you can work on a few things.

Take 2 row that is crushed and spread on backing pan and put in oven for 15-20min (until slightly brown) once the oven has reached 350.

2 row before its toasted

While the 2 row is toasting, and water is heating up, take your pumpkin and start carving.  To carve your pumpkin, cut the top off and take a spoon and scoop out the, “guts” of the pumpkin.  Keep the seeds!  At the end we’ll be using those.

Below are pictures of pumpkin carving

What it looks like inside

Around this point in time, your water should be close to being heated up to 150 and your grains should start smelling like grape nuts.  If it’s been 15 min of toasting, take the 2 row out of the oven. The 2 row should be a bit darker.

Keep the oven on at 350, we’ll be using it again in just a bit.

Below is what the 2-Row should look like. 

Now take all of your grains including the toasted 2 row, put in steeping bag and steep at 150 for 30 min.

Steeping grains:

While the grains are steeping, cut your pumpkin up in cubes and place on a baking pan.

They should look like something on the lines of what is below.

After you have your pumpkin cut up into cubes, put onto baking pans and set them in the oven for an hour. The objective is to make sure that pumpkin is cooked all the way until it is mushy. Don’t cover the pumpkin with tin foil.

The grains should steep for 30min and when the steeping is complete, take grains out, add malt extracts, bring to a boil.  At the beginning of the boil add in 1 oz of Northern Brewer hops.  If you want it to be a little less hoppy I would suggest that you do .5 oz of northern brewer hops. Regardless of how much you are boiling, boil hops for 1 hour.

Your pumpkin slices that you’ve put into the oven will be done before the boil is.  When the pumpkin have been fully cooked, take them out of the oven and put into a steeping bag (nylon bags work the best for this)

 Cooked pumpkins should look something on the lines of below.

You should be nearing the end of the boil by now.  At the end of the boil take your pumpkin that you put into a nylon bag and put in wort.  Turn off heat, and put on the lid.  You’ll let the pumpkin steep in the wort for 1 hour.

Steeping pumpkins

You’ve got an hour to kill so that’s why we kept the pumpkin seeds.  Take the pumpkin seeds that you kept, put salt on them or onion salt (a little goes a long way) and put in the oven at 350 for about 20 min or until brown.

They should end up looking some what on the lines of this.

The 6 Things You Need To Know About Choosing Glass Or Plastic Carboys

You would think that the choice is simple when choosing a carboy.  You have glass carboy’s and you have plastic carboys. But is it really that simple? An ongoing debate has been in the brewing world about plastic or glass carboys ever since Better Bottles have been around on which one is the best option for you when fermenting.

To make life a little bit easier we have created the only guide you need when it comes to knowing about plastic vs glass carboy’s called, The 6 Things You Need To Know About Choosing Glass Or Plastic Carboys . Before we dive in, it’s important to get a general understanding between the two.

Glass Carboy’s

A glass five gallon carboy weighs 13 pounds and take a #6.5 stopper or if you like a tighter fit, #7 stopper.

 Reasons why people like glass carboys:

  • Last a very long time
  • They do not scratch when you clean them with a carboy brush
  • Oxygen cannot penetrate it so you beer or wine will not spoil
  • Flavors don’t stick in glass
  • Come in 5 gallon, 6 gallon, and 6.5 gallon
Reasons why people do not prefer them:
  • They are heavy (13 lbs empty and 5 gallons of water weighs about 42 lbs so your looking at approx 55 lbs when said and done)
  • Storage might be an issue
  • If they drop they can shatter or break
  • Expensive to ship
Better Bottle Carboy’s
A plastic better bottle five gallon carboy weighs about 1.5 pounds.  Plastic carboys take a #10 rubber stopper.
Reasons why people like them:
  • They are light
  • Storage is not an issue
  • Less expensive
Why people do not prefer them are:
  • Scratch
  • Afraid of storing beer in plastic resulting in off flavors
  • Don’t come in 6.5 gallon so you will need a blow off in some cases
  • Cannot take negative pressure
  • When lifting up moving carboy it can and will suck water from air lock into fermenter
Personally I use both glass and plastic carboy’s.  I have collected quite a few over the years of brewing.  I’m really not in favor of one over the other, I honestly will use which ever type is empty when I ferment my beer, wine or mead.  No matter what though, I do prefer using a carboy from primary and secondary fermentation rather then a bucket.  The reason is, the area where air can enter a carboy is significantly less then the area for a plastic 5 gallon bucket when comparing a lid vs a rubber stopper.
A personal story: I had 5 batches of beer going on at once and it came to bottling day.  As I cracked open my first plastic fermenter it was spoiled, then I opened my next, spoiled, next spoiled.  At the end of the day all of my beer was spoiled. Why? I had been using my plastic fermenter so much that the lid itself was not sealing properly any more. After that day I switched over to carboy’s and ever since then I don’t have an issue with spoiled beer.
As shown in the picture below, the area for air to get in for a plastic bucket verses a carboy is significantly larger. Working with carboys is also nice because you can visually see the bung sitting properly as well. 
As you can see, the stopper is much smaller then the lid.

With that background information we can now jump into

The 6 Things You Need To Know About Choosing Glass Or Plastic Carboys 

1) One’s Heavy One’s Not

The first thing that you’ll notice when looking at plastic and glass carboys is that plastic carboys are significantly lighter and for the most part are shatter proof.  Being light and virtually unbreakable making storage fairly easy with them.  Glass on the other had is heavy and can break.

2) Better Bottle Are Made To Avoid Sediment With Racking

One advantage to plastic carboy’s that I don’t hear many people talk about is that the divot at the bottom of the carboy is raised up significantly higher then the glass carboys.  This is a benefit because the yeast/sediment will fall further down in a better bottle then in a glass carboy making racking a breeze with out sediment.  To me this is one of the biggest advantages of the better bottle over a glass carboy.

A picture of this can be seen below comparing the two.

3) Better Bottle Has Ways To Help Clarify

Another advantage that I see with plastic carboys are that the sides come out significantly more then glass carboy’s. Better bottles also have rivets all over the dents that come out as well. The reason that better bottles have these dents filled in with small rivets is that, “floaties” such as yeast or other sediment will hit these dents/rivets and they will fall down.  With the glass carboys they have this feature but again on a very down sized fashion.

Pictures can be seen below comparing the two.

4) They Both Break

So how often do glass carboys break? I’m not really sure to tell you the truth. I can tell you that I’ve heard some customer horror stories with them falling on there feet, bruising the foot and then slicing it open with the shards of glass. I can also say that breaking glass carboys has happened to me as well .  But don’t think for a second that that Better Bottles are invincible. They do scratch when you use a carboy brush.  The other problem with Better Bottles is that if you pour in hot liquid (over 120 degrees) you will most likely melt the plastic aka breaking it too.

Personal Experience With Breaking Glass Carboy:

The worst was when I had 6 gallons of red wine explode all over my basement when using a glass carboy.  The odd thing about it was that I set it down on a folded towel, and I set it down very lightly.  All of a sudden it started to crack and then BOOM!  It exploded.  It led to a long night of moping, cleaning, and air freshener. For a full month walking down into my basement and smelling the red wine lingering in the air served as a constant reminder of a mistake I promised myself that I would never repeat.

5) Better Bottles Can Suck… Literally

A nice aspect to glass carboys are that when you end up picking them up, while it may be heavy, you don’t have to worry about the water in the air lock getting sucked into the carboy.  With plastic better bottles if you pick it up by the neck, the better bottle will bend/flex (because it is plastic) making a suction and by the time you realize what is happening you will see dirty water just get sucked into your brew. Not the best way to start your bottling or racking.

An easy solution to avoid getting dirty water sucked into your brew when using a better bottle is, just take the stopper and air lock off before you plan on moving your beer. When glass carboy users are using all ammo to try to convince others to use glass I seem to see them resort to this problem with better bottles too.  I’ve never really understood why this is a big deal because all the times I’m moved my fermenter I am doing it not for a work out, but because I’m going to be siphoning it and the top is going to have to come off regardless.  So to me, not a big deal, but hey – everyones got there thing.

6) Glass Can Not Only Break, But It Can Break The Bank

The cost difference between plastic and glass at appearance may not be to much if you are walking into your local home brew shop and you don’t have to pay for shipping.  But if your plan on buying it over the internet be prepared for a pricey shipping on the glass carboy.  It weighs 13 pounds and has to get shipped with care/special packaging. When comparing glass to plastic, plastic is by far the easier one of the two to ship.

Conclusion

Like I said in the beginning of this post, I’m really not trying to convice you one road or the other.  If you don’t own a carboy yet and your thinking about getting one, start off with one style and then get the other one later on.  You should be the judge of how you like your carboy, and only you.  There really is not a, “better one” just preference from your own experiences. Everyone has an opinion, and the only real way to learn is by experimenting.

Regardless of what you use, I would love to hear from glass and plastic carboy users and your personal experiences with them.  Every brewer has them.

5 Situations To Consider Secondary Fermenting

A common question I here a lot from home brewers is, “Do I need to secondary ferment?”.  The answer to this question is a bit complicated and really is a case by case, so as of now I will say, “It depends”.

Before we dive in too deep, I should first clarify for those that don’t know what secondary fermentation is.  Secondary fermentation is when the beer is racked over (siphoned from your primary fermenter into another fermenter) into usually a carboy, acting as a second holding area for your beer, wine, mead etc.  With that said, what do you really gain by secondary fermentation? This is where the, “It depends” comes in.

Here are 5 situations when you might consider putting your beer in a secondary fermenter:  

1) If the beer has a lots of sediment, by putting it in a secondary fermenter you will not have as much sediment in your bottle.  With oatmeal stouts this can be a big plus or a brew that has lots of steeping grains.

2) By putting beer in a secondary fermenter you are allowing your beer to settle and for flavors to blend.  This can be a good idea for Belgians or beers of higher alcohols even IPA’s.  Think about chili or soup, it always taste better on the second day. Why is that that? The flavors have blended together.

3) You can use secondary fermentation to add clarifiers.  Post boil claifers work in secondary fermentation.  I personally use gelatin which helps clarify beers.  If your not kegging your beer’s this is one great way to avoid even more sediment in your bottles.

4) You can ingredients to the secondary.  Dry hopping, oak, spices, all of these work best in the secondary.  I have found with my past brews that when you add any or all of the ingredients listed above into a secondary fermentation you can smell them better.  In my opinion, if you can smell it, you will start to pick up on them even more when you taste them.  So if you are trying to bring out certain flavors, consider what you can do in the secondary.

5) Another reason for secondary fermentation to is if you know you won’t be bottling for a while.  Let’s face it we have things to do other then brewing. A good reason to secondary ferment is that if you make a brew, but you know that you aren’t going to have the time to bottle for a few weeks. In this situation I would recommend you put your beer in a secondary and just let it chill out in there for a while until you can get to bottling.  Rule of thumb for me is: I try not to keep things in primary fermentation for more then 2 weeks.  The reason for this is I’ve found that you can get some off flavors to the beer if left to long in the primary.  

So going back to it all, when would you not want to secondary ferment?  It really depends.  Some beers in my opinion really don’t need it.  If you’ve ever come down to Jay’s Brewing or know me personally, I’m sure that I’ve mentioned how I love sessions brews (Scottish 60L, Milds, Browns anything less then 2.5% -3.9% for me). Typically you don’t need to secondary ferment these.

The reason why is that there is not a lot to them.  I make sessions and will have them pumped out quickly.  Quickly as in a week, then they are bottled (really not that hard to do with such a low alcohol level).  If you are trying to stay away from beers that need secondary fermentation, rule of thumb: Don’t brew stuff that is over 6.8%.  I should emphasize rule of thumb, every one has there own rule on this one – this has worked fine for me.

If you are dead set on the secondary fermentation or think that you need to for the next brew, the question normally is, “What should I secondary ferment in?”.  I would recommend a 5 gallon carboy for secondary fermentation. Now there are 2 different types of carboys: 1) Plastic  2) Glass.

We’ll keep this short because I feel that the discussion of preference between plastic and glass carboy’s deserves its own blog post, which we will do in the coming weeks.  But, you will want a plastic or a glass carboy. If it’s for a 5 gallon batch use a 5 gallon carboy.  The reason why you want to use a carboy is that the top of the carboy goes upwards, so surface area of the brew is reduced which makes it less likely to oxidize.

The make shift way of getting around this is quite easy and something I use to do when I first got started out with brewing – I didn’t want to fork over money for a carboy.  I would take the brew from the primary, rack it over to the bottling bucket, clean out the primary/sanitize, pour the beer back into the primary close it up, then shake it up and your done.

Is that the correct way of doing it? No, but it worked and never had a ruined batch from it.  The main thing that you have to do is, make sure to shake it up a little bit. The reason for shaking up the brew is you need to get CO2 to build a layer over the beer to protect it from O2 oxidizing the beer.  By shaking up the fermenter you are getting they O2 out of the brew threw the air lock.

At the end of it, I try not to get too stressed over secondary fermentation. I do it for my, “gourmet” brews that I pride myself on with being more technical.  On just drinking beers, I don’t. I’m sure people could argue either way, on why you need to do it with every brew and people could argue why not to do it.

If your considering using secondary fermentation, I think you should know why you want to.  If it’s one of the reasons that I listed, consider doing it. If you have any other reasons why you should secondary ferment please let us know.

How Often Do You Brew?

I love to brew beer and I brew a lot. I try to brew about 2-3 times a week, I know I’m an outskirt to any statistic when it comes down it to it.  Before you have a knee jerk reaction, most of the brewing that I do is usually a 2.5 gallon batches.  The reason for doing it is because I like to brew sometimes more then I like to drink it. I find also that you can end up doing a batch that is 5 gallons and split it in half and have half of it as intended then make the other half a bit different.  An example could be with a, Pale Ale.  If I make a 5 gallon batch one might just be a regular Pale, the other will have maple syrup instead of corn sugar for the priming of it or another scenario might be that I dry hop it.  You can come up with a lot of ones to make one very drinkable and the other to be more grommet.  One of my favorites is doing a Porter then making half of a Porter into a Vanilla Porter by putting a vanilla bean in the secondary.  I love to make these 2.5 gallons batches to play around with a few different variations of a beer before I do a big one.  Going back to the original question though, how often do you brew?

[polldaddy poll=5488270]