Great IPA Recipe For Those That Don’t Like IPA’s

There are many reasons why you might want to try this recipe, if you are a hop head though, you might as well as go back to browsing other post on this blog because you’re not going to like this one.  Maybe that’s a bit harsh, I should say that this is child’s play for you.

This is really for those that aren’t big IPA fans and are either making an IPA for someone and you know you are going to be drinking some of it, or if you are just trying to get your feet wet in the IPA world, but you’ve had bad experiences so far.   Well, don’t give up!  This is a recipe that you should try if you fall into either of those categories or some where close to it.   I do have some suggestions at the end of it as well as a break down as well.

I’m Going For Round 2 – IPA

Ingredients

1 lbs Munich Malt

.75 lbs Biscuit Malt (or Victory)

.5 lbs Carapils

6 lbs Pilsen Light Malt Extract (Dry)

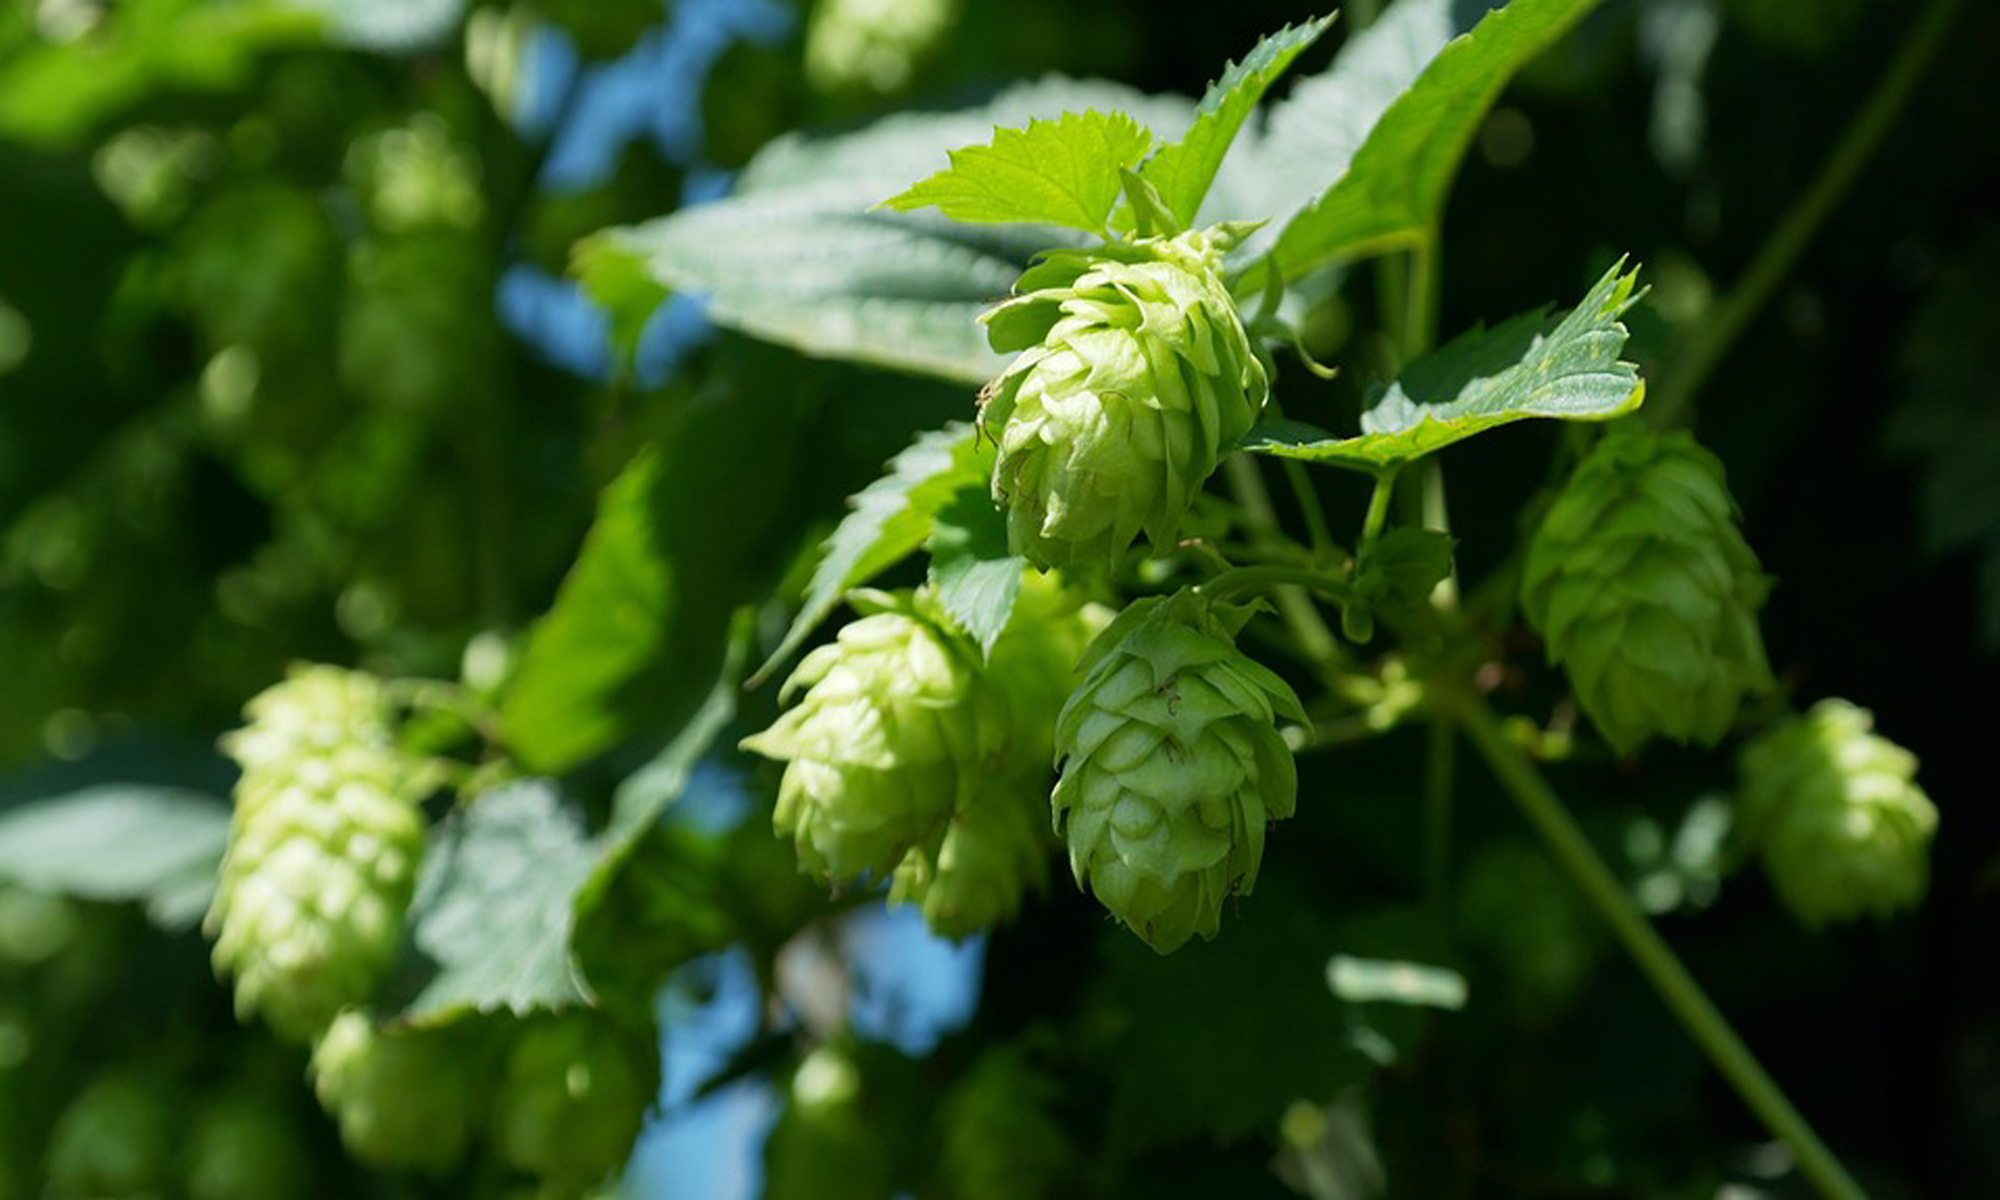
.5 oz Columbus Hops (60 min 7.5 AAU)

.5 oz Magnum Hops (15 min 7.25 AAU)

1 oz Amarillo Hops (Dry hop 12 AAU)

2 oz Crystal Hops (Dry Hop 7 AAU)

WLP 001 or WYeast 1056

Specifications 

OG: 1.064

FG: 1.013

SRM: 8

IBU: 45

ABV: 6.7

Directions:

  1. Heat 2.5 gallons of water up to 150 degrees
  2. Steep grains for 30min, then take out
  3. Add malt extract
  4. Bring wort to boil
  5. Add Columbus hops
  6. Boil for 45 min
  7. Add Magnum Hops
  8. Boil for 15 min
  9. End boil
  10. Cool down, put in fermenter, pitch yeast
  11. Ferment for 7 days
  12. Either rack to secondary or not depending on your equipment
  13. Add Amarillo hops and crystal hops
  14. Let sit for 14 days
  15. Then bottle with 5 oz or .75 cup of corn sugar
  16. Drink it 3 weeks

Analysis of the recipe

This recipe is aimed at people who don’t really like hoppy beers, want to make an IPA but don’t want something that is going to burn off their taste buds after one beer.  So with that said, does this even count as an IPA?  Yes it does, this beer actually makes the mark 100% for style comparison.  What that means is, if you were going to send this into a beer competition, you would be brewing to style for the American IPA.   The IBU’s are low, yes very low for an IPA, just about as low as I could get them actually.  Even with that said though, you are brewing to style (IPA IBU’s 40-60).

The malt bill is really easy.  I chose the Munich malt, and biscuit malt because this is going to give a nice balance.  Both of these malts have this bready flavor to it.  Very appealing to balance out the beer and won’t be overly sweet.  We were staying to Rule #1 for this.  The carapils is really just there for head retention.  It doesn’t change the color, doesn’t add any flavor but will help your beer in appearance.

If you are wondering why Pils was added instead of Golden light, it’s because it gives the beer a bit lighter of a color.  Maybe my taste buds are off but in the past I really haven’t tasted to big of a difference when specialty grains are added. Adding lighter malt extract does make the beer, “Pop” in the glass.  If you are looking at a way to make sure it stays light check out one of our post on how to keep beers light.  Keeping beers light is something I like to do for American style beers, just ascetically pleasing I guess.

When doing the hops, I chose it this way for a very specific reason.  Magnum as well as Columbus are extremely clean hops.  If you go with something like Chinook, it tends to linger a bit giving a grassy like flavor, and cascade taste like a grapefruit.  But the hops we are using are going to come and go pretty quick.  For this particular IPA we are going to dry hop it.  Dry hopping will not impact the flavor, just give it a lot of aroma.  Amarillo paired with crystal hops are becoming a favorite pairing of mine for dry hopping.  Crystal hops have this very flowery smell to them, love it.  Amarillo hops are known to have a little spice and a bit of melon in there.  Now picture this, you get this big smell of floral hops, with some melon and a bit of citrusy aroma going, then take your sip and it’s clean… so legit.

White labs Cali yeast is the go to for IPA’s.  It’s just one that people do so much for them it’s almost becoming the standard protocol.  If you wanted fruitier flavors think about While Labs 051, or if you wanted to dry it out even more it’s not a stretch to think of WLP 007.  It really is all up to you, play around with it.  But if you are just dipping your toes in the water, try out WLP001 – it’s a safe bet every time.

Suggestions:

One thing that you might want to do is try adding some oak chips in with it when you are doing secondary fermentation.  1 oz is what I would recommend.  Just add them in when you’re dry hopping.  What this will do is add an oak flavor to your beer, I know I’m captain obvious.  But the reason why this is nice is, it will help mellow out the hops.  I know 45 IBU’s is not crazy hoppy, but it’s a lot for some – adding oak chips will help mellow out that flavor, and ultimately it will turn out pretty well.

Note: Adding oak chips to beer is a trick that I do if I mess up or don’t get results I like.  I learned early on with making red pasta sauce from scratch that if it’s too acidic, add some grated carrots and it cleans it up every time.  That’s how I use the oak chips.  If it’s too hoppy for me, I just add in some oak chips.  My mess up gets cleaned up and all of a sudden your friends have that, “Ohhhhhhhh”, reaction when you tell them, “Ya I just added some oak chips to make the beer a bit different, it’s an oak aged IPA”.  Little did they know you couldn’t take the heat.  So keep that card close to you.

Conclusion:

This is not a recipe for those that are hop heads.  If you are a hop head, you probably are going to view this beer as a weird pale ale.  But it is brewing an IPA to style.  I know a lot of people don’t like brewing to style and normally I don’t make to big of an effort to either.  But if you want to taste what an IPA taste like when brewed to style, this is a good one.  Not for hop heads, but for people who want to get their feet a little wet into the IPA world.  If you are making this beer for someone who can not get enough of the IPA’s, hopefully at least with the dry hopping they will appreciate a nice bouquet of hops.  The bitter aspect of this beer will be clean, it will not taste like you’re eating a grapefruit or munching on alpha in a field.  Also add oak chips if you are still a bit nervous about making an IPA.  Just be careful, you are always 1 oz away from your beer tasting like mulch when it comes to oak chips, so a little goes a long ways.

Hope you enjoy and good luck!

Let me know if you have any great tips for people that are starting off with the IPA’s!  


Related Post:

Too Many IPA’s

Build Your Own Stir Plate

It’s Time To Move Away From Kits

How To Keep The Passion Of Homebrewing


6 Friendly Suggestions To Make Your IPA Different

If you are like most homebrewers out there, most likely you have tried an IPA.  If you haven’t you’ve been living under a rock for the past 5 years (I only kid).  The fact of the mater is, IPA’s are becoming and have been a big sensation in the craftbeer/homebrewing world for some time now.  Recently I just put up a post about my general opinion of them and got a lot of feed back.  I wanted to have a follow-up post of though.


One of the great things about homebrewing is that you can MAKE tweaks to what ever you want.   So I have compiled 6 friendly suggestions to help keep your IPA’s fresh, different, and still something that stands out among IPA’s that are out there.   I’ve made plenty of IPA’s in the past, and even now I will still make experimental batches of IPA’s.  These are some of the tips and tricks that I use that continue to keep it interesting.

1) Don’t Use Crystal Malt

This is something that I picked up on from a customer that really is pretty religious about his IPA’s.  I’ve had some of his, they are very good.  For a while in the homebrew world you would see, “Crstyal ___L” in about every recipe.  I personally try to stay away from it when I can because I’ve just used it so much.  For IPA’s try to keep them dry, stay away from the crystal malt, build up the back bone of malt with a bready like grain. This will also change the color a bit, so you will accomplish what the crystal does – changing color (but you’ll avoid sweetness).  My suggestion, use any or all:  Victory, Munich, Biscuit, Vienna, CaraMunich (I know CaraMunich is a bit sweet).


What this does, is it will change the color of your beer but also not give too much sweetness.  If you use a yeast that is going to dry out your beer then it shoves the hops in front of everything else.  Having a bready like flavor acts as a really good counter balance to the bitter hops.  It allows the yeast to dry out the beer and you won’t get to much sweetness.  This technique leaves a very clean after flavor.

2) Using Black Malts To Make A Black IPA

This came out sometime last year or the year before. The style was called, “The Cascadian Ale”, later got switched over to, “Black IPA’s”.  Then I’m sure someone thought it was not P.C so it got switched back to, “Cascadian Ale”, then again I think they switched it back.  It’s a vicious cycle and one that I’m not even sure what the name is anymore.  But for the sake of describing it, it’s a, “Black IPA”.


As far as Black IPA’s go, I kinda like them.  I enjoy a stout in the winter time, and to me is just a hoppy stoutish beer.  It’s really the hybrid in my opinion.  The key to these is using, “Carafa III”.  It’s important that it’s dehusked.  For recipes to really make it black use, 12 oz up to 1 lb (per 5 gallons).  On the lower side it will be more brown, to the upper end it’s going to turn it jet black.  The one thing that you might want to consider is adding some calcium carbonate to the beer.  It will help prevent the beer becoming to acidic from the black malts.  If you don’t, you might lose some balance.  1tsp per 5 gallons will be enough.

3) Using Wheat In Your IPA

People started coming to me over the summer asking about these.  To me it’s just a really hoppy American wheat, but if you go a bit more, then it’s a, “Wheat IPA”.  For this one it’s essential that you follow rule #1.  It’s already going to be sweet from the wheat, so don’t go over board.  If you do all-grain, I would suggest using M.O as the other malt to balance out the wheat and don’t even worry about specialty grains (maybe a bit of Munich but that’s just me).  If you go this route, most of the time wheat’s are in a 1:1 ratio with wheat and barley.  Wheat malt extracts already have that included already.  If you are looking for specialty grains, think about using some acidualted malt maybe or even some Rye.

4) Rye & Honey Malt

This is actually one of my favorites that I make.  Rye is one of those malts that for a while was being forced into recipes. Rye-PA’s where also,  “The Thing”, for a while.


Rye has this spicy flavor; very distinct and unique.  Because of the spiciness of the rye, a lot of people will add crystal malt – not I though.  I like to take a twist and add in Honey Malt.  Again, something a bit different to give that sweet and spicy flavoring really pairs well with some traditional American hops (staying true to rule #1).  When I do this one, I like to FWH which is when you add the hops in before the boil, and then I will go crazy towards the end of the flavoring and for flame out as well as dry hop.  I try not to overly hop the flavor section of this style of beer.  I really try to make it easy to taste the  sweet and spicy in the mix.  Doing that technique for this beer style really makes an interesting beer.  Amarillo hops are amazing for aroma and maybe something clean in the beginning like Magnum.

5) Use English Hops

One that is underused is using English hops for an IPA.  I know it’s not an American IPA but again, something a bit different.  Target is at 9%, East Kent Goldings sits around 7%, Fuggles are in the low 4% – I’m sure if you play around with them a bit then you can come up with something very interesting.  My personal preference is I like to use the lower alpha stuff towards the beginning of the boil and the higher alpha stuff towards the end of the boil.  Just personal preference but I always feel it’s easier to drink that way.  Then again, it’s best to play around with it and see what happens.


6) Using Belgium Yeast

Belgium IPA’s are interesting.  These really bring out some interesting beers, normally I have found that when I do this, it’s either a big success or a complete failure.  Usually there is no middle ground.  The best results that I’ve had are with Trappist Ale.  The reason for this is because you can have a pretty big malt bill for this and it will be able to do something with it.  If you go for another Belgium Ale yeast, usually you risk having too much residual sugars which really make an unbalanced beer.  Typically using Trappist Ale yeast will leave a big complex body, use that with conjunction with some aromatic malt or even some acidulated malt and you’re going to have something that is off the wall different.  Using Nobel hops would also give it a twist or just German and Czech hops.


Conclusion

All things considered, there are ways to make your IPA something a bit different then the ones that you can get in the store.  Making a different style beer is one of my favorite things to do in this hobby.  While some people like making clones, I would rather build up a recipe that is going  to bring something different to the table and push the limits.  Traditional beers are fun to do and there is always a special place in my heart for them, but wacky beers are also kinda fun to play around with and also test your knowledge of brewing, just like moving from automatic to manual. So if you want to test your abilities with your homebrew knowledge, try to change it up a bit and challenge yourself with making a non-typical IPA.

My question for you is, do you do anything thing special to your IPA’s to make sure that they stay a bit different?  I would love to know.

Cheers,


How To Use 6-Row Malt For All-Grain

One of the base malts that is rarely used is, 6-Row brewers malt.  A lot of people blow off 6-row as a base malt and it is often overlooked.  While I personally don’t use it very much, I do find myself at times looking at 6-row as the only possible solution for what I am trying to achieve.  So this post is here to help bring better light to 6-row and how to use it in your beer. A lot of people ask,  “What is the difference between 6-row malt and 2-row malt?”.  Most of the time, homebrewers will use 2-row for their base malt.  But, there are times when using 6-row is better served and 2-row just does not have the properties that are needed to accomplish certain flavors or conversions which 6-row can.

So what is 6-row malt?

6-row malt is base malt, it’s a type of barley.  One thing to note about this particular type of malt is, it has less potential as far as the OG is concerned.  Essentially what that means for you as a brewer is, if you use 10 lbs of 2-row pale in one batch, and 10 lbs of 6-row in another batch, you would end up with a higher OG for the 2- row when comparing it against the 6-row.  The grain it self contains more proteins and it is huskier.

6 – row alt has a higher amount of amylase in it as well.  Amylase helps convert starches into fermentable sugars.  That’s why you will see with pumpkin beers or even cream beers (because they use corn), 6-row is usually the preferred malt to use.  If you are looking to do any cereal mashes, 6-row is the ticket that you want.  Having 6-row as your base malt will help get the most out of these different adjuncts to aid with flavor as well as ABV.

Flavor Of 6-Row

The flavor of 6-Row is pretty unique to me.  The only way I can ever describe it is, it has a, “grainy” flavor.  The flavor it’s self doesn’t have a lot of depth like M.O but defiantly has more flavor the 2-row brewers malt.  It’s this very, “old school”, flavor profile.  If you have tried any beers that are pre-probation recipes you’ll get the same flavor.

When To Use This Base Malt

I like it for some of my American lagers, it has this, “old school”, flavor as well as look to it.  As stated before, any beer that has corn, flaked rice, or any vegetables it would be good with.  I’ve made some, “old school”, American IPA’s with this malt that turned out pretty well.  I did a SMaSH brew with this and cluster hops, and called it a “Cluster IPA”.   Doing something like that kinda gives a feeling that you made one of the, “Original” American IPA’s.

My Personal Preference With 6-Row

When I go all-grain, I tend to lean on M.O or just American Brewers malt.  Both of these seem to do pretty well.  When I’m making beers that don’t have a lot of specialty grains I really like to use M.O.  It brings out this nice biscuit flavor.  To me M.O is nice if you want a malt forward beer or if you are hopping the beer like crazy because it has this nice, “back bone” to it.  If you really are looking for specialty grains in your beer, then 2-row pale/2 row- brewers malt is what you might want.  The 2-row pale and 2-row brewers malt doesn’t bring a lot of flavor into the beer.

And that is where 6-row usually falls.  Not a lot of space for it. It fit’s into this box that is narrow but well defined.  Any old style American lager, or any starch like beer, American 6-row is going to find its place.  Also the one thing about 6-Row is, it is pretty husky.  That makes it great for if you are making a wheat.  It will help prevent any stuck sparges.

Conclusion

At the end, it is an underused base malt but it’s easy to see why. There are times when it does make sense to use it and I would not avoid using it in those circumstances.  If you are looking to bring out any really cool flavors I would play around with it and maybe even make a SMaSH just to see how the flavors work with it.

I do want to hear about if you use 6-Row at all and if you do, when and how you use it!   Leave your comments below!

Cheers,

So Many IPA’s… Too Many IPA’s.

This opinion piece is going to ruffle the feathers of the hop heads out there but I have to stand by what I believe.  This is inspired by going out to the beer fest this past weekend at Bull Run.  It was lot’s of fun and it was exciting to see so many customers out there.  It’s always nice to see a familiar face no matter where  you are!

What I noticed when I was at the beer fest was that every tent had an IPA.  If it wasn’t all tents, it had to be close to all them, with the exception of the cider tents and the single wine tent that I saw.  Now  I’ve noticed this trend in the past few years over at total wine as well.  What I see happening is the implosion of the style of IPA’s in the near future and this is why.

Why I Think There Are So Many IPA’s

Right now IPA’s are the, “cool thing”, a few years ago it was wheats, and before that I’m not really sure.  But pretty much every brewery has an IPA.   There is this expectation now, if you are a brewery you need to make an IPA.  You can thank dogfish for that.  My personal experience though when I was trying IPA’s at the beer fest was a lot of them sucked.  I would drink them and think, “What were you trying to do?!”.

Part of the reason why I think that there are so many is just because breweries think that it will be their ticket to fame.  “Maybe we’ll be the next Stone Brewery, who knows?”, wait I know, you’re not, there is already these big breweries that have hashed out there market share and no matter what you do you can’t be Stone.  It’s like the ma and pop store trying to be Walmart, you need to take another approach or guess what, you’ll go under.  Could it happen? Sure.  But will it happen, chances are not so much.

You Can See It Already Happening

Go down to total wine and tell me what beer shelf looks the most packed, IPA’s every single time.  It’s a complete over saturation of IPA’s.  While there may be a new brewery that does something different in this venue and that’s why you are going to try them out, most likely you start to just make your choices off of label, “Oh that looks cool, I’ll give it a try” or, “That name sounds cool, lets give this one a try”.  Much to your surprise, the beer called, “Dogs Ass IPA” really does suck and you can only figure the brewer took a literal interpretation of what he thought it should taste like.

The style of the IPA has been almost completely destroyed in my mind.  A little more hops, a little more ABV then it’s brother the Pale Ale.  This was done, originally because hops are a natural preservative, and the beer had to make its way to India from England (long trip).  If you made a regular Pale Ale, it wouldn’t last the trip.  Also on that note, most IPA’s were oak aged because that’s how they were sent.  The oak would also mellow out the hops a bit giving a bit more complexity as well to the higher ABV so it didn’t taste as, “HOT”.  Will you find that today in most IPA’s, hell no.   Even Pale Ale’s of today are what people would call IPA’s from just 5 years ago.  The style is getting jacked up.

Time To Beat A Dead Horse

Quick, gun to your head name 5 IPA’s… you could probably do that in your sleep.   Now let’s try that with, Vienna lagers, or Brown ales, or Irish reds, or English bitters.  Not so easy right?  That is what I would call over saturation.

If you are thinking, “Well it’s because those other styles suck and that’s why we don’t know about them.”, I would have to say no, it’s that every one is concerned about making IPA’s and no one cares to really make any other style.  Also I can understand that’s where the market is, but that’s the same argument of commercial breweries, “Light lagers are what sell”.  Craft beer is supposed to be about the craft, not about appeasing the masses.  And further more on that, you are supposed to be a master at the craft.  If you suck at making IPA’s why are you making them, you have this micro-commercial mentality but really can’t do either one.   At the end its a corny marketing scheme that will fall short every time someone has a sip.

Real Question Is, “So What?”

If you  are thinking, “So What?”, I feel you on that.  Naturally there is going to be a correction of the IPA market and unfortunately for lots of micros a correction of the ones that just go into it because they had clever names or a good graphic artist.  At least that’s what I hope is going to happen.  If it doesn’t then there will just be a lot of bad beer on the market and craft beer will be known for using lot’s of different, “Hard to get” hops.

Where I Personally See The Beer Market Going…

First off, I think that it’s not a fad, the, “craft beer revolution” as people call it is here to stay for quite some time.  Especially for people who homebrew, you know what good beer taste like.  Unfortunately, for many of us (homebrewers) our favorite beers you can’t even buy in the store.  One of the best IPA’s I’ve had is from a customer (Dave) that makes an amazing IPA.  It isn’t the style that I make all the time but, I do enjoy a good IPA when I taste one.   And another beer is a German Honey lager made by another customer (Kevin) which is amazing.  To bad I can’t go to the store and get either one, because I would buy them.

I see craft beer hanging around for some time, but the breweries that are going to ride out the storm are ones that have a niche or bring something new, or a different style.  If you can describe them as, “They’re kinda like _______, but a bit different”, they won’t last or they will always be second best, at best.  The ones that come in with a new direction or bring something interesting to the table are going to be able to keep up.

Buying Local

I see people starting to buy beer from local breweries.  Here in VA there was a law that was just passed back in July that make it easier for breweries to open up since they aren’t going to need a distributor to sell on premise.

Since there will be more competition you will see smaller breweries start pushing the limits of what they can do to make themselves, “different”.  Most of these places are getting started by homebrewers so, I think you find the love of the craft back in the Nano’s.  I haven’t ever lived in area where there were a lot of nano’s though so I’m not really sure how they do.  But I would hope that can drive the market even while picking up the crumbs from the bigger players.

I think that smaller breweries will be forced to make some different styles just to stand out, and to give people a reason to come back for more.  Hopefully, they inspire the love of the craft more and don’t fall into copying everyone and there brother.

What To Get Out Of All This

In my opinion, I think its hard to deny that there’s an over saturation of IPA’s on the market, and that eventually the IPA field will either fall part, be redefined or it will just get weeded (but a significant weeding).  Different styles that are less common are going to start making there come back soon enough just so people can stand out.  Even though I feel as if a lot of breweries are getting into the business just to try nifty marketing themes, I believe that they will be weeded out because if it doesn’t taste good, it doesn’t taste good.  The ones that brew with passion and pride in their product will be masters at their domain, even if it’s a small market share they are going to continue to drive people continuing to love craft beer and trying new as well as different styles.

Let me know what you think!


Follow Up Post

Pumpkin Wine Recipe – 1 Gallon Yield

Looking for a wine that is good in the fall?  Maybe seeing pumpkin beer has got you bummed out if your a wine maker.  Well this is the recipe that you want to do if you want to make a pumpkin wine.  With this wine you can either produce a super dry wine which will be around 18% or a sweeter wine, it’s all based off the wine yeast.

If you wanted to go the high alcohol route use Lalvin K1V-1116 or Lalvin EC-1118. If you wanted to have a sweet wine use, Red Star Côte des Blancs.  This will get you about 13% with 5% residual sugar.  If you wanted a little less sweet I would recommend Lalvin 71B-1122.

This is one of those recipes that you want to get a early start, it takes some time to get done with this recipe.  Make sure you have plenty of time.


Pumpkin Wine

Yield: 1 Gallon Batch

  • 5 lbs grated pumpkin flesh
  • 2 lbs finely granulated sugar
  • 1 tsp pectic enzyme
  • .5 oz citric acid
  • 1.5 tsp yeast nutrient
  • 1/4 tsp yeast energizer
  • 1 finely crushed and dissolved Campden tablet
  • 6-1/2 pts water
  • Wine yeast (see above and choose)


Directions:

  • Take pumpkin flesh and grate the pumpkin flesh. (Don’t place chunks in a blender and attempt to chop them.)
  • Take water bring water to a boil and stir in the sugar until dissolved.
  • Take off the heat, and then put pumpkin flesh in primary.
  • Pour boiling water over pumpkin.
  • Take mixture and cool to room temperature and add crushed Campden tablet.
  • Take cover and put on top of primary and allow to sit 8-10 hours.
  • Add pectic enzyme and allow to sit overnight.
  • In the morning, add citric acid, yeast nutrient, energizer and yeast.
  • Cover primary and shake daily for about 5 days.
  • Take mixture that was in the primary and pour through a nylon straining bag and let pumpkin drip drain.
  • Transfer to secondary and put on an airlock.
  • If you do not get a full gallon of liquid, wait 5 days and top up as necessary.
  • Rack after two weeks
  • Rack again after additional 30 days, topping up and refitting airlock each time.
  • Set aside for 3 months and then rack, stabilize, sweeten if desired.
  • Wait 3 weeks rack into bottles.
  • Set aside and wait 1 year to drink.


Skeeter Pee, Have You Heard About It?

Every so often I would get customers coming into Jay’s Brewing talking about this drink called, “Skeeter Pee”.  Well I never knew what it was.  Finally last week a customer told me about it once again and I started asking questions.  I’ve never made it but it’s something that I want to make for sure.  So first off this is the recipe:

For a 5 gallon batch

3 bottles of 32 oz 100% lemon juice (e.g ReaLemon in the green plastic bottles or equivalent)

7 lbs sugar (or 16 cups) to ferment

3/4 tsp tannin

6 tsp. yeast nutrient (3 now, 3 later)

2 tsp. yeast energizer (1 now, 1 later)

Approx, 4 1/2 gallons water

Yeast Slurry

Potassium metabisulfite (Kmeta)

Potassium sorbate (sorbate)

Sparkolloid

2 1/3 lbs sugar (or 6 cups) to sweeten finished Skeeter Pee. Use more or less for your tastes.

The whole recipe can be found here, and honestly, I would check out their website to answer any more questions because I haven’t made it yet.  Essentially it is lemon wine that kinda taste like mikes hard lemonade with a twist.  It will pick up flavors from the yeast cake that you pour on so, I would think that using a white wine yeast cake would be the best option.  But not having made it yet, I have very little input.

The guy has a website dedicated to this recipe that he made up.  Honestly after reading up on this website I kinda felt out of the loop a little bit, like where have I been, living under a rock?!  But the website does have FAQ, some photos of it being made, even how to serve it!  To say at the least, I was spending some time on his page looking around and learning.

All I know is this, it’s cheap (less than a dollar a bottle to make) it’s high in ABV (10%ish) and it’s relatively easy (sounds like it’s hard to screw up being very forgiving).  So if anyone has made it let me know about your success stories and any pointers.  It does sound good, and one that I plan on making very soon.


How To Make Dog Treats With Spent Grain

When you get done brewing extract with specialty grains or all grain brewing, you always have left over grain.  Well, waste no more – you can turn this spent grain into dog biscuits.

Making dog treats out of spent grain is pretty easy.  My dogs love them (I got 3 big ones, the smallest weighs about 115 lbs) and these treats go pretty quick.  One thing that I need to state though is, make sure that you don’t have any hops included with the spent grain.  Hops are actually harmful to dogs and will kill your dog or cost you for vet bills.

So this is the recipe that I use, I know that there are other ones out there but this one is pretty easy.

Dog Biscuit Recipe

4 cups grain which has been steeped
4 cups flour
1 cup peanut butter
1 egg

Directions

  • Take all your ingredients and mix in a large bowl, until it looks pretty evenly mixed up.
  • Take the dough like substance put it on a cookie sheet that has tin foil on it.
  • Press down and make it so that it’s an even thickness – don’t make them too thick!
  • Either use a cookie cutter to make shapes if you are creative or, take a knife and cut them into squares.
  • Spread them evenly over the baking sheet and bake for about 30 min at 350 F to solidify them.

  • After they have cooked, take them out, loosen them from the tin foil, and break apart if needed.
  • Spread them around evenly if needed.
  • Put them back in the oven at 225 F for 8 to 10 hours to dry them thoroughly (this will prevent any potential mold growth.)
  • Store in an air tight container.

So try it out, I’m sure that there are other recipes that are floating around the internet or variations.  Either way it’s pretty easy, and my dogs love them.  I figure a treat for me (beer) and a treat for my dogs (spent grain) and everyone is happy.

Cheers,


Related Post:

All-Grain Series

5 Brewing Personalities

Colonial Beer Recipe

Calculating ABV


How To Improve/Build Your Own Pumpkin Beer

It’s fall and if you are brewing with the season, this is the time of year where people start making the pumpkin brews.  If you are like me you’ve tasted lot’s of pumpkin beers.  I’ve found myself in the past making pumpkin beers even though I really don’t like them but rather because it’s, “What you are supposed to do”, as a homebrewer.  I told myself that this year I was going to do a pumpkin beer that I actually like, and it’s not really even a 100% pumpkin beer.

So how do I make a pumpkin beer without going all pumpkin?  What I do is, cut the amount of pumpkin with either : 1) Butternut squash or 2) Acorn squash.  I say either or, because some people like one over the other.  But if you don’t really care, then either will work.  I tend to lean towards the acorn squash when I make mine.

Why This Route May Be For You

If you are like me and in the past you have found that when you drink a pumpkin ale, all you can taste is the spices and not actual pumpkin.  If that is the case and you want to taste the squash, this route may be for you.  For me I actually want to taste the pumpkin itself, not the spices.  My personal opinion is if you can’t taste the pumpkin then what was the point of even adding it, so you can say it’s a pumpkin ale?  I would just say it’s a spiced fall beer.  That is why I’m adding and also suggest to add other types of squash to the pumpkin ale, these different types of squash really shine in the beer and will accent the pumpkin flavor to a point of being recognizable.

How To Build A Recipe That Will Accept A Pumpkin Flavor

We wrote a post a while back on how to build your own recipe.  In it we really talk about focal points.  What a focal point is, is the characteristic that you are trying to bring out of the beer.  For this pumpkin beer what we are going for is a strong pumpkin/squash flavor.  So how do we do that?  We strip down every thing that does not contribute to that pumpkin flavor.  Building a basic recipe for this beer is better, don’t go crazy.

Specialty Grains For This Beer

As a base recipe, I would use something that resembles a pale ale, standard bitter, brown ale, light porter or amber.  I would do minimal specialty grains and probably something that has malty flavors to really accent on the pumpkin also.  A rule of thumb for this would be  1 lbs – 1.5 lbs of specialty grains and something on the lines of, Munich, Vienna, Amber malt, victory, or biscuit.  If you choose to make a brown or a porter, I would suggest using butternut squash because not the acorn squash because it has a hazelnut after flavor when you brew with it.  If you want to use some recipes as a base recipe, check out beertools and just see what some look like, copy and tweak things you think look good.

Hop Addition For Pumpkin Beer

When I do the hops for pumpkin or squash beer, I do a first wort hop addition (FWH).  The funny thing is that I use to do these all the time when I first started brewing by, “mistake”, but I honestly like the way that they taste, and not sure why more people don’t use them.

A FWH addition is when you add the hops to the wort before it even begins to boil, then you bring it to a boil.  What this does is provides a less, “harsh”, bitter flavor to your beer.  There is a scientific reason for this that I won’t get into, but if your interested here is a link .

Going back to FWH, it will keep the hops uniformed for your main attraction, the pumpkin/squash.  Also for the hops with FWH I would go for something between 6AAU and 10AAU, that’s personal choice though; just a suggestion (If you don’t know what AAU are click here).  I honestly wouldn’t add any aroma hops with it if you were planning on spicing it because it’s going to take away from the spices or it’s going to be faded out by the spices.  For this beer, simple is going to be better.  Also last tip, since squash has an earthy flavor, use earthy hops not citrus hops. If you keep a common theme, it will be less chaotic.

How Much Pumpkin/Squash Should Be Added?

I usually go with 6 lbs – 10 lbs of pumpkin for a, “normal” pumpkin beer.  For this recipe though I want to use squash as well, so if you wanted to cut the pumpkin I would go with a 3:2 ratio of squash to pumpkin or even a 2:1 ratio. That goes for the total weight before it’s cleaned.  So for me I’m going use 3 acorn squashes (they normally weigh about 2 lbs -3 lbs each) and 1 small (and I’m talking I only want 2 lbs of pumpkin small) pumpkin.

How To Use Pumpkin/Squash In A Recipe

When using pumpkin/squash, heat your oven to about 350.  Cut and clean your pumpkin/squash and then put it in the oven until it turns a bit brown and starts to caramelize up.   A suggestion that a customer gave me that is worth sharing is, he said he does this the day before and then freezes it.  The reason for freezing it is, that it is easier to take the skin off the squash/pumpkin because you really don’t want to steep it with it.

When To Add The Pumpkin/Squash Into The Beer Recipe

Put the pumpkin/squash in with the specialty grains and steep them.  In the past though I really try to steep my grains and squash for about one hour if I can.  The reason for this is I want to get as much out of it as possible.  Also I’ll use a bit more water then I normally would, closer to 3.5 gallons (if I’m doing specialty grains) because the pumpkin/squash will absorb some.  If you are doing all-grain just add them in with the mash, and make sure to include about a 1 pound of rice hulls so you don’t get a stuck sparge if you don’t really trust your sparging abilities.

Pumpkin Spices

If you really wanted to add some spices to your beer (which I’m not), what I would suggest is wait until the very end.  If you add it in the boil, you will pick up flavors with it.  I would try to do it right before you bottle or keg.  This gives you a bit of a handicap.  You will just pick up on the smell of the spices, but the pumpkin or squash will be what you taste.  The hops at the end will be smooth and with out a, “harsh” bittering flavor.  So for me, I’m not doing any spices at all.  I don’t want this to be a pumpkin pie recipe, just pumpkin (and squash of course) recipe.

There Is Still Time

There is still plenty of time left for this recipe, you can make it and have it ready for thanksgiving or just a fall time beer.   Pretty soon, I’ll be putting up some idea’s for xmas brews that you can do – of course the typical with the spices but also what I plan on doing this year to avoid spiced beers.  Hope you enjoy.


Other Post We Have About Pumpkin Ale’s

1) Pumpkin Pie Recipe

2) Pumpkin Pie Recipe Variation

New Website For Jay’s Brewing

If you’ve gone to our website  you might have noticed that it has changed a bit.  We are no longer doing online orders and will just be doing sales with our physical shop that is located in Manassas.  I want to personally thank all those that ordered from our website and we appreciated all the business that you gave to us.  The website doesn’t have too much on it right now and it’s a work in progress for building up content on it but it will start getting tightened up this month.


One of our plans is that we will have a downloadable catalog for it with all of the items that we carry in our store.  This will get updated when ever prices change some new items come it.  Beyond that you can contact us by e-mail or by phone if you have any questions on what we carry.


Mixed Berry Melomel Recipe

This mead is a purple mead, and is full-bodied on the tongue.  After every sip you can taste something different.  This mead is one that I always lean on just about every year I make a batch.

5 gallon Batch

Mixed Berry Mead

12 lbs Clover Honey

3 gallons Water

2 tsp yeast energize

2 tsp yeast nutrient

3 lbs strawberries

3.5 lbs black berries

1.5 lbs raspberries

2.5 lbs sweet cherries

Lalvin RC212

Ferment the base (or must) for 2-4 weeks until it slows down.  Then add the fruit.  let it ferment for a few more weeks.  Rack it if you would like, then bottle it.  If you want to have it flat, add Pot. Metasulphite to it (1/2 tsp per gallon).

It’s a really easy mead, one that I make just about every year and one that I think that you might enjoy if you are new to mead or an avid mead maker.

Related Post:
Spiced Mead

Ginger Mead Recipe

Sack Mead Recipe

5 Situations To Consider Secondary Fermentation